Navigation

Showing posts with label bicycle restoration. Show all posts

Monday, October 9, 2017

A Little Piece of History In My Garage


It's been a long time since I've had a new project to work on. Maintaining the bikes we already have in our garage keeps me pretty busy, regardless of whether or not they're ridden often. But I've continued to keep my eye out for a good donor bike. I've been interested in maybe doing a heavy-duty resto-mod, turning an old road or mountain bike into a bomb-proof modern commuter. I just haven't been able to find the right platform for such an undertaking (I'll know it when I see it). Then earlier this week, I came across a local listing on Craigslist that I couldn't pass up: a 1983 Trek 850.

To look at it, the old Trek 850 isn't anything to write home about. The frame looks a lot like an old touring frame, complete with cantilever posts, curved fork with a steep rake, lugged frame, and high bottom bracket. The handlebars are a mile wide and it's got a really wonky V-shaped stem. The frame has a fair amount of surface rust, the whole thing is faded and dusty, and some of the componentry is non-original. The whole rig is pretty rough shape and has clearly been neglected for quite some time.

However, this particular model of bicycle is the first mountain bike produced by Trek. That's right...THE first Trek mountain bike. And once you understand the historical significance of this beat-up old specimen, it starts to look a lot more tantalizing. It begins to become less wonky (though it's still definitely wonky), and instead becomes a lot more special. It's a part of cycling history. And for mountain bike aficionados, the transition from home-built klunkers to mass-produced mountain machines like the Trek 850 was a really big deal. It's cool to get my hands on such an iconic bike.

So what comes next? One thing's for sure - there's no way I can bring myself to make major modifications to this bike. It's going to be restored back to its original glory...sort of. The machine is in rough enough condition that it'll never be quite as gleaming and blemish-free as it was in the summer of '83. Some of the patina is here to stay. But I'd say that's appropriate for a nearly 35-year-old bicycle. After all, this bike and I are the same age; and I've definitely got a few battle scars too.

It's going to be a really fun project. I can't wait to see how it turns out.


Monday, January 9, 2017

The Versatility of Early Era Mountain Bikes


I'm loving this 1987 Schwinn High Sierra restoration project from Josh Capps over at The Simplicity of Vintage Bicycles. I would call this a very light resto-mod, turning an all-terrain machine into a neighborhood grocery carrier, but clearly maintaining the look and feel of the original bike. I mean, he kept the damn thumb-shifters for God's sake!

But look closely and you'll see some pretty neat updates. The Bullmoose handlebars are probably the most jarring change; they're pretty eye-catching and quite distinct. But don't overlook the Brooks Cambium C17 saddle, which is a relatively new non-leather addition to the Brooks product line. It looks right at home on the High Sierra - so much so that I almost missed it at first glance.

I must admit I've been considering a project much like this. I obviously have a fondness for old GT mountain bikes, but vintage Treks and Bridgestones do it for me as well. With a few modifications here and there, one of these machines would make a fantastic (and essentially bomb-proof) urban assault bike. Now I just need to find the perfect donor bike/frame...

Monday, September 26, 2016

Built For The Long Haul: 1986 Panasonic Touring Deluxe


For nearly 5 months now, I've been working on building up a 1986 Panasonic Touring Deluxe frame. I could've pretty easily done it in half that time, if not less. But I had no budget for this project, so much of the delay in getting the bike built was due to continuously searching for steep discounts on components and parts. This project was also a bit of an oddity. It's a vintage bike and I wanted to stay true to its origins. But it's also a machine I wanted to reliably put thousands of miles on. For this reason, I struck a balance between new and old - seeking out used, vintage-era components when I felt that newer parts weren't needed, and bolting on brand new parts when I needed the advantage of a modern component.

So this was not a restoration project. Think of it more as a resto-mod. Whatever it is, this is my personal tourer and I can't wait to start cranking out some mileage on it.

The Frame: In a previous post, I discussed details of the frame, so I won't rehash those. Before I started buying parts for this build, though, I wanted the frame to be in top condition. I picked up some automotive touch-up paint from my local auto supply store and hit the more worrisome spots on the chainstays and fork with a couple coats. Once it had been touched up, I hosed down the inner surfaces of the tubing with Frame Saver. Then I used a polishing wax to clean it up and make the paint shine, followed by a coat of hard shell wax to protect the paint and minimize further oxidation in the areas where the paint was chipped or scratched.

The Drivetrain: The front and rear derailleurs are period-correct Shimano Light Action derailleurs (FD-Z204 and RD-L523, respectively). They're controlled by a set of clamp-mount Shimano L412 Light Action downtube shifters. A Shimano TZ20 6-speed freewheel, Hyperglide chain, and UN26 bottom bracket round out the Shimano-heavy drivetrain. The whole thing is pushed by a Takagi crankset. I don't know much about this crankset, as it came with the frame when I bought it. What I do know is that it's not original to the bike. However, it's in very good condition and a perfectly serviceable crank. I may someday replace it with something closer to original, but as for now it will do nicely.

The Brakes: As I discussed in a previous post, I had some issues finding suitable brakes for this build. Stopping power is provided by a beautiful set of Shimano 600 EX BL-6208 brake levers that I picked up on eBay and Shimano Altus CT91 cantilever brakes. While the CT91s don't quite have the vintage look of brakes like the Tektro CR720s or the Paul Neo-Retros, they're decent brakes that can be purchased for shockingly low prices, so I'm sufficiently satisfied with the end result.

The Wheels: This was one of my favorite parts of this project: building wheels. These particular wheels are a creation of my own design. I picked up a pair of vintage Shimano 105 HB-1050 front and rear 36-hole hubs that match the OLD on the old Panasonic frame for a great price from my LBS. I laced them to a set of brand-new Velocity Dyad 700c touring rims using DT Swiss Champion 2.0mm straight-gauge spokes. After all, it's a heavy duty bike that deserves heavy duty wheels. These fully custom, hand-built wheels are the ultimate in old-meets-new for the purpose of maintaining a vintage look - as well as compatibility - while maintaining maximum performance. Not so different from the rest of the machine!

The Accessories: In typical touring style, the saddle is a honey color Brooks B17 saddle, with matching honey color Brooks Microfiber bar tape. The tires are Schwalbe Marathons in a 700x32c size, and I'm currently using Shimano A530 pedals. I topped the whole thing off with a Racktime Add-It rear rack and a set of Jenson stainless bottle cages that give the bike a nice vintage - and slightly wonky - flair.


Wednesday, August 10, 2016

Modern Cantilever Brakes on a Vintage Touring Frame: A Cautionary Tale


In general, older brakes don't have quite the same stopping power and responsiveness of newer versions. The return springs tend become less sharp in pulling calipers or cantilevers back to their resting positions and the parts just don't seem to engage with one another quite like a brand new set of brakes. Plus, my Panasonic Touring Deluxe uses cantilever touring brakes, and finding original-era parts can be difficult and expensive (used versions of the Shimano AT-50 cantilevers that originally came on the bike can easily fetch $50-100 for a full set on eBay - comparable to many brand new cantilever brake sets).

Luckily, the resurgence of touring bicycles and the creation of multi-use styles such as cyclocross, hybrid, and gravel bikes have brought cantilevers and V-brakes back onto the market in a big way. So after reading numerous reviews, taking careful consideration of my limited budget, and accounting for the look and aesthetics that I'm targeting with the finished machine, I decided to go with Tektro CR720 cantilever brakes on the Panasonic touring bike. The CR720s have a fantastic, vintage-touring look and feel, are fairly well regarded by other touring cyclists, and are somewhat inexpensive. I found a great price for the brakes online and bought them.

Soon after receiving my Tektro CR720s, though, I discovered a problem. When I slid the brake arm and return spring over the post, I immediately noticed that the arm was extended so far outward that it was slumping downward. And the brake pad hit the braking surface of the rim at an angle, so no matter how much I fiddled with it in the slot of the brake arm, it was always contacting the rim along the edge of the pad where it would do almost nothing to slow or stop the bike. There just wasn't enough room for the brake to contact the rim appropriately. The rim and cantilever post were too close to each other.

I read through bicycling forums and quickly found that others had run into the same problem. Cantilever post spacing on older bikes is much more narrow than on modern frames and often won't accept newer canti brakes. So I was left with two choices: bite the bullet and pick up a set of vintage cantilever brakes at a premium price or keep buying different models of cantilever brakes until I found a set that worked through trial-and-error.

That's when I remembered that I had stashed away an extra pair of old Shimano Altus CT91 brakes that I had mounted onto my GT Outpost mountain bike. I dug out one of the brake arms and slid it over one of the Panasonic's front cantilever posts. After a bit of tinkering with the position and angle of the brake shoe, Voila! It fit perfectly! Even better, the CT91s are still widely available and can be purchased new very inexpensively (it's not uncommon to find them on sale for under $10 a pair). Admittedly, they don't have the same vintage look of the Tektros - in fact, I'd go so far as to call them ugly as hell. On the other hand, they've got fairly long brake arms that are pulled tangentially to the arm's direction of travel, giving them a decent braking force compared to the more widely-set touring and cyclocross brake arms of other models. And speaking from years of experience using them on my GT Outpost, they're pretty much indestructible.

They may not be pretty, but the Shimano CT91 brakes should work out well. In fact, they may be the only modern cantilever brakes that will work on my vintage touring frame.


Wednesday, May 11, 2016

Panasonic Touring Deluxe: A Blank Slate

I've never really built a bike up from a frame before. Sure, I generally strip each of my project bikes down to the frame when I start a rebuild. But I normally try to reuse as many of the original parts as possible, so I work within those boundaries and thus don't take too many liberties with the aesthetics of the bicycle beyond a saddle upgrade and grip or bar tape color. In the case of my Panasonic Touring Deluxe project, though, I'm starting with only a frame and a fork. It's basically a blank slate, and I'm free to be creative with how I build it up.

With that said, I plan to piece the machine together with a mix of original components - specifically for the drivetrain - and new or non-original parts. I've already picked up the Shimano Light Action groupset that came stock on the 1986 Touring Deluxe, and I plan to hunt down the matching Light Action downtube shifters. While I'm not as concerned about the make and model of the cockpit parts, I would like to retain the original look of the bike with a simple gooseneck quill stem and randonneur bars. Probably the coolest parts of the original bike were the Shimano drillum brake levers, so I'd like to find a set for this project.

I've been agonizing over what to do about wheels. Initially, I wanted to use this project as an opportunity to build my first set of wheels. But I also like the idea of fixing up an old wheelset that is from the approximate vintage of the bike. I think I've found a compromise - lacing new touring rims to a set of used vintage hubs. And in the hopes that I can pull it off, I picked up a brand new set of 700C Velocity Dyad 36-hole touring rims over the weekend. Eventually, I'm planning to pick up a pair of serviceable used hubs from my LBS to lace them to.

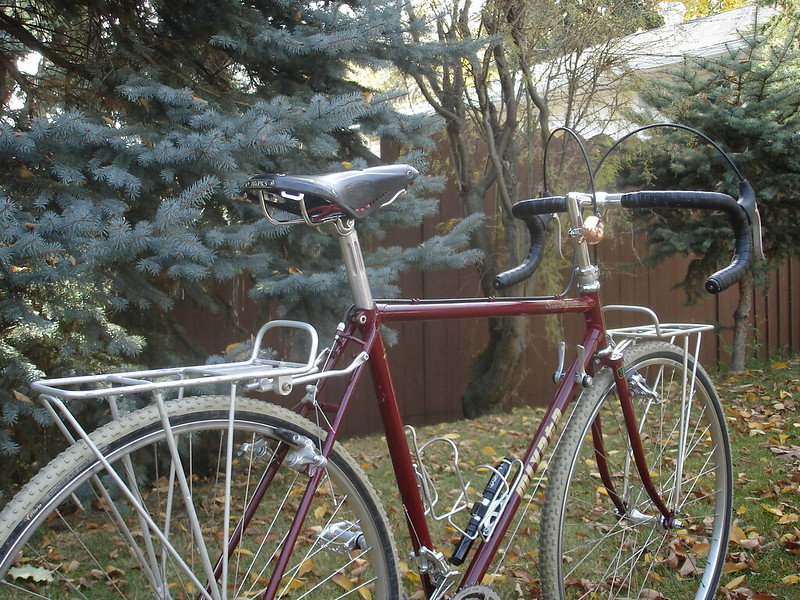
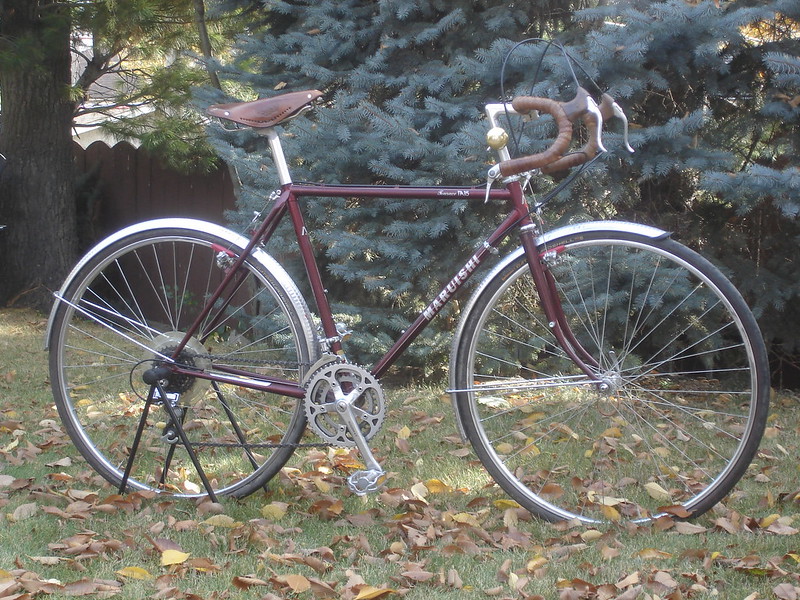
Regarding aesthetics, I plan to go with unpainted aluminum with most - if not all - of the components on the Touring Deluxe. With the dark red of the frame and the white lettering of the decals, nearly any color scheme will look great on the bike. Certainly a black saddle and black bars would look nice, similar to this Miyata 615. But I also really like the way this Maruishi looks with the dark aged Brooks leather of the saddle and the bar wrap. Then I ran across this handsome specimen - an identical year and model as mine. I don't much care for the green cloth-looking wrap on the bars, but the lighter color brown saddle looks very attractive. With this in mind, I'm thinking I'll go with an even lighter shade for the leather that will really pop against the dark red of the frame; perhaps a honey color Brooks. Not sure about bar tape, as I'd like to see the rest of the bike built up before I make that decision.

This is going to be a fun project, but I'm planning to take my time and do it right. Look for good deals on parts to keep my project costs low, while also paying particular attention to the quality of the components that I add to the bike and level of craftsmanship that I devote to it. After all, I plan to put some serious mileage on this bike and I want it to require as little maintenance - especially field maintenance - as possible.


Monday, May 9, 2016

New Project: 1986 Panasonic Touring Deluxe


Since RAGBRAI last summer, I've been on the lookout for a touring rig. What can I say? Spending days out on the road appealed to me, and I'm hoping to do more of it. While my Peugeot PH-10 could probably do the job as a light tourer, it's not really meant for that kind of duty. Indeed, the frame geometry is pretty compact, it doesn't have front-side eyelets on the fork for a front rack, and it only has one set of mounts for a bottle cage. Plus, I've built up the bike as a commuter, so to tackle longer rides, I've started swapping out pedals and using cleats, which reduces my leg extension. Then I have to slightly raise my saddle when I use my clipless pedals. It just ends up being a pain, so I decided the best (and most fun) course of action would be to build up a proper touring bike.

I picked up this Panasonic Touring Deluxe frame on eBay for a decent price. It came with the original fork and headset and a non-original Takagi triple crankset. The frame is constructed of double-butted Tange 1000 chromoly and the fork is Tange Mangaloy 2001. They're perhaps a bit on the heavy side, but are certainly fine materials. The frame and fork are in beautiful condition, with only light signs of wear, aside from some denting and scuffed paint on the chainstays where a previous owner had bolted on and over-tightened a kickstand clamp. Shouldn't be a problem to buff out any rust spots and touch up the paint, though. According to the 1986 Panasonic catalog, the frame color is Canyon Red, and it's a really good-looking deep maroon. But what I really love about the frame are the decals, which are a sparkling white that really pop in the sunlight.


The machine has double eyelets both front and rear for fenders and racks. It also has two sets of bottle cage mounts. The relaxed geometry with long wheelbase is ideal for touring, so it really is a true touring bike. Probably not the best for heavy touring duty, but it should handle light to medium loads without too much trouble. The old Panasonics are well-regarded and are, by all accounts, solid hand-built rigs that have become sought after in some circles. I'm looking forward to getting started on rebuilding this bike, and then spending many years riding it.


Monday, April 25, 2016

The GT Outpost Gets (Another) New Life


It took some work to get the old GT Outpost into decent condition after being neglected for so long. Once the bike was undressed down to the frame, the components and frame were cleaned thoroughly with soap and water. After that, I attacked any spots of rust with the polishing wheel. The front derailleur and the original crankset were too far gone, so they ended up in the trash. And I figured this was the time to go ahead and replace the old, beat up rear derailleur as well. KC was kind enough to give me a spare Shimano STX RC rear derailleur and a Shimano XTR crankset, and I picked up a Shimano STX front derailleur from Queen City Cycles. Once everything was cleaned up, I bolted the components back onto the bike. Then I slapped a new chain on the drivetrain, ran new cables and housing, and dialed everything in.

I've developed a new-found respect for this bike as I worked on it over the past couple weeks. The triple triangle frame made with 4130 chromoly is pretty much bulletproof. It also has double eyelets both front and rear, so it's ready to handle loaded all-terrain touring. Many miles on the Katy Trail have shown that it rides beautifully on longer trips. And my best attempts at attacking single track have shown that it's highly versatile. While I don't ride it as often as I should, I hope to keep this machine around for many more years.


Friday, June 20, 2014

Buy a Brand New Bicycle

I've been reading Chin on the Tank and a handful of other motorcycle blogs that focus on resto-mods for a few years now. I love seeing some of the wild design concepts those guys come up with. While I occasionally entertain the idea of making the leap into motorcycle restoration, it's not something I've had the money, time, or drive to pursue. My small fleet of bicycles keeps me plenty busy and - for the most part - pretty happy. So I think I'll stick to simple, human-powered machines for the foreseeable future.

Earlier this week, Ed published a great post called Buy a Brand New Motorcycle and I couldn't get over how much it paralleled my experience in giving people guidance on buying a bicycle. When shopping for a bike, it's easy to get on Craigslist and be enticed by the $50-100 price tags of used machines. But two of the things I've learned from working on old bikes over the years are: 1) shit breaks and 2) people don't take care of their shit. Shearing old brittle anchor bolts and snapping derailleur hangers are pretty much par for the course if you work on an old bike long enough. And you can pretty much bet on dealing with bent chainrings, hubs and bottom brackets filled with molasses-like sludge, and derailleurs that have never been cleaned or serviced.

I enjoy a challenge and I take great pleasure in tinkering on my bikes, so bringing a neglected bike back into working condition - and fixing everything that gets jacked up while doing so - is all part of the fun. But not everyone has the time and energy to do this. And yeah, you're only going to spend $100 up-front for that 1970's roadster, but then you've got to pay to have the thing tuned up. That'll get you out on the road, but if you want it in really good working order you've then got to drop another $100 for an overhaul, plus an additional $100-200 or so in parts (cables, housing, tubes, rubber, brake pads, etc.). Now your investment is up to around $400-500, which is about as much as you'd pay for a pretty sweet flat-bar road bike. On top of that, most shops will service your bike free of charge if you buy it new from them, which is a major cost savings for ongoing maintenance.

So yeah, old bikes are cool, but don't fool yourself into thinking you're saving any money or getting some kind of bitchin' deal.

Saturday, May 18, 2013

An Especially Special Stringer Bicycle


My Dad brought his 1975 Raleigh Sports into town last weekend to pedal around downtown for Bikes & Brews. He ended up leaving the bike with me so that I could tune it up, as it's been in storage for quite some time. Last night, I poured myself a gin & tonic and hauled the old girl down to the basement. It's really a beautiful bike: a classic English roadster with a copper color frame. It even has the original leather saddle (my old man bought the bike new in 1975).


I put a couple coats of leather conditioner on the saddle and tensioned it a bit to reduce some sagging that was beginning to occur. Next, I ripped out all of the old cables and housing and ran new cables, including a new shift cable kit for the Sturmey-Archer 3-speed hub. Once I had all of the cables adjusted properly, I added a few drops of Tenacious Oil to the rear hub and pulled the machine out of the repair stand.


The bike is now functioning great. It could stand to have a few parts replaced in the near future; a new chain, new brake pads, new tires and tubes, etc. There are also some areas that are beginning to show some surface rust, so a heavy cleaning and rust removal might be in order. But other than that, it's in great shape and is an exquisite specimen. Maybe I can talk him into letting me hold on to it next winter so I can give it a full overhaul and polish.

Saturday, March 30, 2013

Update on the New Motobecane

I put together a nice little before-and-after image of the 1982 Motobecane Super Mirage mixte, and then completely forgot to include it in the post when I showcased the finished bike.  So here is a side-by-side of one picture I snapped the day I started working on the bike, and another after I had finished work on it.

Ginger and I ride to work after lunch most every day.  It's really the only time we are able to ride together during the week.  And I have to admit that since she started riding the Motobecane, I've had some difficulty keeping up with her.  The machine really flies, and in all honesty Ginger's probably in better pedaling shape than I am, especially since she's accustomed to riding the heavier Raleigh Sports.

Thursday, March 21, 2013

The Finished 1982 Motobecane Super Mirage


As you may have already noticed, I finished Ginger's '82 Motobecane Super Mirage early this week.  I apologize for not updating more frequently on the progress of the bike, but the basement is a bit dark and cluttered for taking decent pictures.  So I decided to just let the finished bike emerge from its dark, below-ground cocoon.


I can't say that this project was as seamless and straightforward as some of my previous machines.  The disassembly, cleaning, and rust removal went more-or-less as expected.  But there were a few snags in the process of reassembling the bicycle.  The first notable snag was how to run brake lines.  See, step-through frame bikes have rear brake calipers that are sort of upside-down - the cable comes into the calipers from below the brakes, along the seat stays.  But I replaced the old brakes on this bike with a set of brand new long-reach calipers.  The new calipers are designed with the housing stop at the top, as is traditional for non-step-through frame bikes, so I had to do some creative cable running.  As you can see in the picture above, I ran the rear brake line through the existing guides on the top tube, then between the two laterals, where it made an 's' shape into the rear brake caliper.  It's maybe not ideal, but it will have to do; and I'm pretty happy with the action on the rear brake.  I've also considered cleaning up the old brake calipers and putting them back on the bike, but I'm still undecided.  My main reason for not switching back to the old brakes is that I like the increased stopping power of the new calipers.


The second, and potentially ongoing, issue that I had to deal with was fender clearance.  I accessorized the bike with a set of hammered alloy fenders from VeloOrange.  I should preface by saying that these fenders are gorgeous.  They also come with ample hardware to mount the fenders in a number of different ways. The front fender went on the bike without a problem.  But the rear fender comes painfully close to the tire as it passes under the rear brake.  So close, in fact, that the little rubber nipples on the new tire hit the fender, making a sort of swishing sound as the rear wheel turns.  It's actually not the rear brake that is the cause of the clearance issue.  The source of the problem is the brake mount that runs between the seat stays, which is far too low and close to the rear wheel.  Eventually, though, a little elbow grease and patience was all that was required to alleviate the problem, and hopefully alleviate it permanently.


Some of the other notable additions or modifications that I made to this bike include the beautiful vintage  Suntour downtube shifters that the folks at Queen City Cycles assembled for me, and the Wald 215 rear rack.  In fact, I liked the Wald rack so much I bought two of them and put one on my bike.  It's also worth noting that one of the old Weinmann brake levers was totally shot, so I trashed them and picked up a set of nearly identical levers from The Hub.  The new levers, however, have a pretty ingenious quick-release mechanism for releasing brake cable tension that is really cool.  The wheelset, rubber, tubes, fenders, and 6-speed freewheel I also bought from The Hub.  Along with the shifters, Queen City was my source for bar tape, brake hoods, cables, and a few other odds-and-ends parts that I needed during the course of the project.

Wednesday, March 20, 2013

Meet my new ride


Cody just finished my new bike!

He'll bring you up-to-date on the specifics later, but I'll just tell you it's beautiful. It has a gorgeous new Brooks saddle, hammered fenders, a sweet little rear rack, fancy hoods and cork bar tape. And, hand to God, it doesn't weigh more than 5 pounds.

Okay, that last part is an exaggeration (and also probably blasphemy), but it's the nicest part about this new hotness. It's so much lighter than my Raleigh Sports. I felt like I was flying today. There's this one hill I have to climb as I'm headed home from work - normally I dread the thing - but today it was so easy!

That Cody of mine really outdid himself with this restoration. I couldn't be any happier with the outcome.


Monday, February 25, 2013

New Project: A Shop Update

Things are moving along nicely with Ginger's '82 Motobecane Super Mirage.  We've been discussing a number of functional and aesthetic ideas for this bicycle.  Ginger has veered me away from the plan that I initially had for this bike, but some of her thoughts have been bold and impressive.  And now I'm really excited to see how it turns out.

After I brought the bike home, the first step was to take the machine apart.  I pulled all of the components off the frame and found that some of the parts were likely not original - most notably the mismatched brakes.  I decided to go ahead and trash the calipers and install a whole new brake system; a decision that will enhance both the look and the safety of the bike.  I also made a list of parts that were missing, such as chain ring bolts, shifters, and decent wheels.  Then I cleaned and polished all of the components, taking care to carefully remove surface rust, and made sure the frame was clean and the bearing cups and races free of old grease and debris.


Once I had a full inventory of any parts that were missing or needed to be replaced, I made a run to a couple of the nearby bike shops in town.  I also put in a few orders for parts that weren't in stock at my LBS.  When I got home, I bolted on the parts that I had available and made sure any moving parts were lubricated and functioning properly.  Now all that's left is to wait for the orders to arrive at my home or at my LBS so I can get the thing assembled.  Speaking of which, here's a little sneak peek at one such order that was waiting for me when I got home from work today: