Navigation

Showing posts with label Peugeot Course. Show all posts

Thursday, May 24, 2018

Better Late Than Never: Critical Bike Maintenance


For the past few months I've had a couple ongoing - and probably unrelated - issues with the drivetrain on my 1980 Peugeot Course. The first issue was a clicking sound that was consistently happening at the same point through my pedal stroke. Visual inspection didn't reveal any observable problems with the crankset, so I figured the problem was with either the bottom bracket or one of the pedal spindles/bearings.

The second issue was more worrisome. Under very hard pedaling, such as when accelerating from a stop, the chain would occasionally 'slip.' This would usually happen when I was mashing down particularly hard and standing on the pedals, so to have the chain suddenly slip forward would sometimes cause my feet to lose traction with the pedals. I nearly ate shit several times trying to power through busy intersections. Not good. This problem appeared to originate from the rear derailleur, as the freewheel seemed to be in good shape and was relatively new. Replicating this problem on the repair stand was difficult, though, so I was never able to observe it very clearly.


Fixing the first issue was pretty straightforward. The problem could have only originated from the bottom bracket or pedal bearings, so I just replaced both. I didn't necessarily expect to replace my pedals, but when I went into my LBS for a new bottom bracket, I spotted a beautiful pair of gold MKS touring pedals. I had not been overly happy with my All-City track pedals for commuting and was feeling like something with a wider platform/cage and more grippy surface would be better on the Peugeot. So I took the opportunity to swap them out for something a little better suited to my needs.


The second issue was a little more tricky. I replaced the rear derailleur with a cheap used Suntour GT that I picked up on eBay, but the problem continued - and in fact got worse. So I found a newer derailleur that more closely matched the vintage of the bike, and also matched the front derailleur: a Suntour AR. For good measure, I swapped out the freewheel with another unit that I happened to have on hand. Unfortunately, it was a bit wider than my old freewheel, and the wider freewheel was rubbing against the frame of the bike. I moved some hub spacers around to get the freewheel away from the frame, but now my rim is out of dish. Not a big deal...I just haven't had the time and motivation to re-dish it. Probably something I'll get around to later this Spring.

I set out to fix a couple maintenance issues. In so doing, I ended up making some unexpectedly significant changes to the look and function of my bike. I'm pretty happy with the matching derailleur set - something this bike has never had, at least not since I took possession of it in early 2012. And the MKS touring pedals are pretty great...grippy and functional with a sleek, classic look. I'm probably a little behind on some other regularly scheduled maintenance - repacking hubs, in particular. But for now, the old Peugeot is running well enough.

Monday, February 20, 2017

Spring Tune-up Came Early


The 1980 Peugeot Course received a much-needed facelift and tune-up over the weekend. The bike was covered in gray/black grime from being ridden in wet conditions. This was particularly bad - as it usually is - on the chain stays. There was also a thick coat of brake pad compound around the fork crown and the seat stays. While these may have been the worst spots, the whole frame was in an overall state of nasty and was badly in need of a thorough cleaning and polishing.


In regards to functionality, my shifting and braking had become mushy from the old neglected cables and housing. The bar tape that I put on the bike specifically for RAGBRAI 2015 was, at this point, pretty much disintegrating. And I recently decided to get rid of my Cardiff leather saddle after it had developed a pronounced ridge down its center line that was causing uncomfortable perineal pressure, so I swapped it out with the frighteningly ugly and rock-hard synthetic saddle that had come with Ginger's Motobecane Super Mirage. That too needed to be remedied.

I picked up an old, beat up Brooks B17 at a good price on eBay and snagged some RikeRibbon bar tape in a gaudy carbon gold color. What can I say? It beckoned to me. While at my LBS, I picked up cables and accessories. I also brought my intern/son along, and we had need to fortify ourselves after procuring our bounty. So that's what we did.


Once I had everything I needed, I got to work disassembling and cleaning the bike. I left the headset and cockpit where they were, as I find that the headset only needs to be overhauled rarely. And once you've got the cockpit set up just the way you want it, it's a huge pain in the ass to ruin everything by unnecessarily taking it all apart.


All the components were degreased as needed and cleaned up with a bit of soap and water. Once the frame was dry, I used a cleaning/polishing wax to give it a bit of luster and some protection from the elements and the general abuse of daily commuting. After I applied the wax, I had to wait for it to dry before buffing it off, and I enjoyed the down time with loud music, a delicious beverage, and thoughts of political resistance.


Reassembling the bike was mostly quick and painless. The components went back on the bike with ease and running cables and housing and getting everything dialed in on this machine is something I can practically do in my sleep. The old Brooks took a bit more work, as I noticed that the leather was very soft and pliable and sagging slightly, which caused the sides to splay. I thoroughly conditioned the old saddle to make sure the leather wasn't brittle, then drilled a couple holes along the bottom of each side and laced them together with a boot lace. The result is nearly perfect: a soft supple saddle that gives slightly under my weight without sagging.


The old Peugeot is definitely showing its age, but then again it hasn't exactly been coddled in the 5 years that I've had it. I ride it nearly every day and it continues to be a dependable, low maintenance machine for daily commuting, bar hopping, and around-town jaunts. Exactly what you'd want in a bicycle.

Sunday, May 24, 2015

Spring Tuning Continues


Over the winter, the cage on one of the Peugeot's stock pedals cracked. On top of that, I lost the dust cap at some point, and the grease was beginning to leak out. So I figured it was time to replace them. The original pedals were French-threaded, though, so I had the good folks at Queen City Cycles re-tap the cranks for me. Then I added some All-City Track pedals in a pretty sweet gold color that closely matches the gold lettering on the PH-10's frame. A bit flashier than I normally prefer, but I must say they look pretty slick.


Next, I ran new cables and housing and re-wrapped the bars. In the process I decided to go ahead and move the brake levers up slightly on the handlebars to give me a somewhat more upright, less stretched-out riding position when resting my hands on the hoods. I also tried a new bar tape that the guys at QCC recommended - a thick-ass 2.5mm tape from Zevlin with an RBICI design. While the bar tape looks and feels great and the pedals are totally rad, I decided to try running the brake cables over the bars rather than under them, and I'm not happy with the way it turned out. So I'll be re-routing the cables as soon as I get a chance.


I still need to replace the bottom bracket cartridge and I recently noticed a pretty decent bend in the outer chainring that needs to be addressed, so I've got more work to do. But in the meantime, the old girl's riding pretty well.

Tuesday, April 14, 2015

Dusting Off the Wrenches in the Tinkery


As I mentioned yesterday, Spring is tune-up season. So I took some time over the weekend to get the Peugeot into prime condition for riding season. I should note that I ride nearly every day through the winter, so regular maintenance is a year-round affair. But on one of the first mild weekends of the year, it feels awfully nice to wrench on a bike with the garage door open and a beer in hand. I got the Peugeot up on the repair stand Sunday morning, which put me on a deadline for an afternoon ride on the Galloway Trail.


First step was to replace the dangerously spent brake pads. I picked up a bulk supply of Jagwire pads on the internet recently and I was looking forward to trying them out. They're a bit different than the original Nashbar pads that came with calipers - thicker and not as sleek - but they're a lot grippier than the Dia Compe pads that I used to use and I really like the old-school look.


Other than a general cleaning, my other task was to repack the hubs. The front hub went pretty quickly, as it uses standard ball bearings. But I forgot that the rear hub uses Suntour cylindrical bearings, which had me scratching my head until I found some disassembly and cleaning instructions online. In the end, I got the hubs repacked and rolling smoothly.

I didn't have time to tackle cables and housing, which wouldn't have mattered anyways since the guy in the shop accidentally sold me a mountain brake cable along with the other road brake and shift cables I bought. I was also considering replacing the bottom bracket cartridge, so I'll probably end up grabbing one of those when I pick up the one brake cable I'm lacking.

Wednesday, January 21, 2015

A Gentleman Carries His Umbrella Using a Leather Frame Cinch


Indeed.

I've been looking for an excuse to take a picture of my bike against this wall - an outer west-facing wall at my workplace. Took the opportunity yesterday morning when I decided to document my method for carrying an umbrella by bike.

Heavy cloud cover in the morning (when this picture was taken) was forecasted to turn to rain throughout the afternoon. I had an afternoon meeting on the schedule a few short blocks from my office, so I brought my umbrella to keep me dry during the walk. What better way to carry an umbrella on a vintage Peugeot than with a leather frame cinch?

Friday, August 30, 2013

If you're going to bike, you might as well be fancy

Was just looking through files on my computer and found this:

Wowzers.

Cody always looks nice for work, but this was a special day back in June. There was a press conference and everything. Big research announcement.

Why didn't I post this back then? No idea. But I sure wish I did.


Monday, April 22, 2013

Stringer bike date

Cody and I hired a sitter and went out on a bike date. Yay! We rode around downtown to take pictures. This flea market, the STD,  is as delightfully shady as you imagine. I hope they still have those wonderful wicker chairs I spied in there (hands off, Springfield. I have big plans for those).

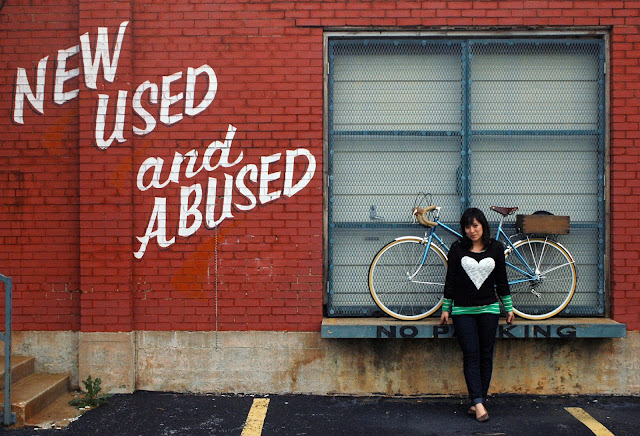
How great is this mural? We work across the street from each other, and both see this every day. Downtown's buildings are full of great old art like this. It's one of the things I love about this city. Why, though, is Cody standing like that?

It's because I asked him to stand near the World's Biggest Turd. This photo doesn't even do it justice. Freakish, it was.

I tried to sneak some behind-the-back photos while we were riding. I was not as sneaky as I thought I was.


Anyway, we biked around some more until we found a rolling pub crawl. There was a great deal of awesome, including this Frankenbike.

So much about the group was amazing. We rode with them for a bit. Riding in a group of around 50 strong was so unexpectedly wonderful. It made me miss our Sunday Joyrides. We didn't really know anybody, but we did get to talk to some very nice people, who all seemed like old friends, which always makes for a fun atmosphere.

One of the places we went did not have adequate bike parking so some of the riders got creative. This, we liked.

Anyway, we eventually split off from the group and met up with a couple of friends at a sweet little place called Skinny Slim's, where I had the most delightful Old Fashioned. It was easy to spot my date in a crowd.

When we went outside to show my new bike box off to our buddies, and found a smoker's empty in my rig. Awesome.
Anyway, we do not often get the chance to have a night out together. Now that we've found a great sitter, we hope we can make this a more regular activity. Maybe, with more awesome and less littering.


Monday, June 25, 2012

The Great Shifter Upgrade

After I had finished restoring my Peugeot PH-10, there were a few things that I was still a bit unsatisfied with.  One of the main problems was that the outer chain ring was slightly bent; enough so that I get a fair bit of chain rub on the derailleur in otherwise reasonable gear combinations.  Another issue was the ugliness of the old Simplex stem shifters that came on the bike.  Not only was the bulky plastic molding between the shifters an eyesore, but it looked like it had been beat on with a hammer, which made it look notably worse.


I had been considering replacing the stem shifters with a pair of bar-ends, but just couldn't pull the trigger.  I had excuses:  I didn't want to have to re-wrap the bars, I didn't want to replace the nearly-new shift cables, the stem shifters worked perfectly fine so why fix something that isn't broke, etc.  But a couple weeks ago, I decided that it was time to take action.  I picked up a set of vintage Suntour bar-end shifters on eBay for about 40 bones.  They were in decent shape, and I got a pretty good deal on them.  Then I ran down to my LBS for some new shift cables and bar tape.


I removed the stem shifters and cables and unwrapped the bars.  To install the new shifters, they had to be disassembled so that the expander plugs and mounting bodies could be tightened into the ends of the handlebars.  Once the mounting bodies were secured in place, the levers were bolted back into them.  There's nothing to these bar-ends, and they were a snap to install.  Once the shifters were properly installed, I cut new cable housing and ran the cables.  I decided to go ahead and run the cables under the entire length of the bar tape.  I know some people prefer to have the housing exit the bar tape before the bars begin to curve, but I think that looks a little sloppy.  To keep the housing in place, I used electrical tape to secure the housing directly to the bars, and then wrapped the bars with the new tape.  It ended up looking fantastic.


The night that I finished installing the new bar-ends, I ended up riding home from a friend's house.  It took me a few blocks to get used to the action of the shifters - the first time I tried to up-shift I almost veered into a curb.  But it didn't take me long to get comfortable with the mechanics required to shift smoothly while holding a steady line.  I think the switch to bar-ends was a pretty good idea; they work like a charm and they look phenomenal.  Now I've just got to figure out what to do about that bent chain ring.

Monday, March 19, 2012

Winter Project: Commuting Machine


This will be the final post in which I refer to this bike as a "Winter Project."  Winter comes to an end this week and this bike has become my commuting and around-town-fun rig.  So it now has a place on the wall of the garage and is officially a member of the Stringer fleet.

One of the first additions I made after I finished the project was a hideous rear rack.  This was the rack that was on my previous commuting machine, and it's also the platform for our child carrier.  When I'm commuting to and from work, the child carrier stays in the garage and I strap a small set of Nashbar panniers onto the rack.  These panniers are actually a bit small for my needs, but the small size is necessary due to the odd position of the rack supports.  Rather than bolting to eyelets at the dropouts, the rack supports clamp onto the seatstays.  The resulting sharp forward angle of the supports, along with their short length, causes full size panniers to fall into the spokes of the rear wheel.  This is a pretty major problem, and it took destroying a set of panniers for me to realize just how detrimental it was.  But these panniers from Nashbar have a rounded bottom and are very short, so there is no risk of the back corner grabbing the spokes.  Lately I've also been considering putting the child carrier on a different bike and adding a new, less clunky rear rack to the Peugeot so that it won't look so ugly.

I also recently added a set of SKS fenders.  Because the Peugeot Course has oversized eyelets, I had to go buy my own hardware to get these things bolted on.  But other than that, getting the fenders on the bike was pretty straightforward.  I'm pleased with how they look - somewhat understated and not particularly flashy - and they seem to get the job done.  They're also pretty inexpensive; I picked these up at Klunk for about forty bones, plus five bucks or so for the extra hardware.


So far, I'm really liking the feel of this bike.  It's fairly lightweight and the frame is just the right size.  I'm having a bit of a problem with toe overlap and I keep slamming my toe clip into the front fender when making low-speed turns, but I'm trying to be more conscious of my foot position so that it won't continue to be a problem.  I guess I could also just remove the toe clips, but I've grown to like them quite a lot.

Sunday, February 26, 2012

Winter Project: Ready to Ride


Booyah!  I finished restoring my 1980 Peugeot Course over the weekend.  By the way, I did some research on the bicycle's serial number and am now confident in the year of manufacture.


I received my new chain and bottom bracket on Thursday and pretty much immediately swapped out the ill-fitting bottom bracket and added and adjusted the chain.  I was much happier with the shorter axle length of the new bottom bracket.  With the drivetrain components in place, I ran cables and housing and adjusted the derailleurs.  The final touches included clamping on my brown leather Cardiff Cornwall saddle and wrapping the bars in matching brown bar tape.  Once it was finished, it looked pretty much exactly as I had envisioned it.


The bike rides very smoothly.  It's lightweight and comfortable.  And the frame is just the right size for me.  I'm getting some notable wobble in the front wheel, so I'll have to do some truing, but other than that, this machine is done.  I think I've just finished building my new daily commuter.

Monday, February 20, 2012

Winter Project: It Was a Productive Weekend

The Peugeot Course is starting to come together.  In fact, it's beginning to resemble a real, live bicycle.  A couple of weeks ago, I picked up some cheap Kenda 27" gumwall road tires, along with tubes and rim strips.  I put them on the mint condition aluminum Araya rims that came on the bike and bolted the wheels onto the frame.  I should mention here that Tom, the guy who gave me the bike, is obviously skilled at repacking hubs, as the wheels spun wonderfully and I was glad to not have to do it myself.  With the rear wheel on the bike, I was able to get a good look at how the chain rings lined up with the freewheel.  It was not good.  A really shitty chain line would've been in store for me.  This was just as I suspected, so I put in an order for a new bottom bracket with an appropriate axle length.  And that's the end of work on the drivetrain until I get my new bottom bracket in the mail.

Next, I put a stem and barset on the bike.  Because the frame is just a shade large for me, I decided on a very short stem that I had lying around The Tinkery.  The old bars were pretty beat up, and the brakes that came on them had suicide levers on the flats, which I absolutely hate.  So I bought some new-to-me drop bars from Klunk, along with a pair of beautiful, still-in-the-box, NOS Dia-Compe brake levers.  With these bolted/clamped on and the wheels back on the bike, I was pleased with the progress.  Oh, and I also stuffed the old seat post back into the frame, even though I'm considering buying a new seat post and clamp.


The next day, I was out in The Tinkery realigning the rear wheel of Ginger's Raleigh Sports.  The boy watched me do this, and when I was finished, he obviously decided I had done an inferior job.  So he snatched the 15mm wrench from my hand and went to work.  That's when I snapped this picture.


How great is that?  I can't wait until he's old enough to help me out with these projects for real.

Friday, February 3, 2012

Winter Project: Starting the Rebuild

As I mentioned in a previous post, I am working on an early-80s era (possibly late 70s?) Peugeot Course road bike over the winter.  I hope to have a fully functional machine by spring, and my intention is to use the winter to find good deals and sales on the parts that I need so that the build will be relatively inexpensive.  My first order of business was to trash the old Motobecane center-pull brakes that had been added by the previous owner.  These were replaced with a pair of inexpensive Nashbar long reach road brakes.  I've always been a little wary of Nashbar products, as I've heard a number of horror stories from friends, but I have to admit that I've never had bad luck with any of their house products.  And at $29.99 plus shipping for the brakeset with all necessary hardware, including shoes and pads, I just couldn't pass these up.  I had to do some drilling on the frame to open up the brake mounts to make these fit - evidently modern road brake mounts are a bit different than they were 30 years ago - but within minutes I had the new brakes on the bike.


Next, I took a trip to my LBS, where I picked up some new headset bearings and a bottom bracket.  Interestingly, when I took the headset apart last fall, I found that the top bearings were caged while the bottom bearings were loose - or maybe vice versa.  I decided to go ahead and replace both sets of bearings with brand new caged bearings.  With the headset and front fork installed, I moved on to the bottom bracket.  A little elbow grease was required to get the cartridge bottom bracket threaded into the shell, but once in place, getting the original Peugeot cranks bolted on was a snap.


This was the point at which I ran into my first major problem:  it would appear as though the taper on the old BB axle is not the modern JIS square taper.  Because of this, the cranks did not slide as far up onto the new axle as I had expected and I'm worried that I'll be left with a really poor chainline once I get the rest of the bike put together.  As for now, though, I'm going to go ahead and leave the bottom bracket alone until I know for sure that it won't work.

I should also mention that I purchased a new saddle for the bike.  It's a Cardiff Cornwall in tannic brown.  I picked it up online for a fraction of what I would've paid for a Brooks, but I've read that the quality is notably poorer than even the bottom-of-the-line Brooks saddles.  Once I get the saddle on the bike and put a few miles on it, I'll address this a little more thoroughly.

Monday, January 23, 2012

My New Ride? Time Will Tell


I decided to take on a new project over the winter.  Last fall, a family acquaintance offered to give me an old Peugeot Course road bike that he had been pilfering parts from for his current project - a vintage Motobecane.  When I inspected what was left of the bike, I found it to be in surprisingly good condition.  In particular, the frame looked to be in decent shape, and I found the pearl-white color with the sandy brown lettering quite lovely.  I've been very happy with my current commuter bike - a 1972 Raleigh Record - and I wasn't really all that excited about taking on another big restoration project with the summer coming to an end.  But I just couldn't get past how good the frame looked, and since he was giving me the bike free of charge, the price was right.  When I got the bike back to my parents' house, where it lived for a couple of weeks before making its way up to Columbia, I snapped a picture of it with my cell phone:


Not much to look at, I know, but there seemed to be a lot of potential to turn this thing into a sweet little commuting machine.  I decided to take the entire winter to work on it and use the extra time to find good deals on the parts needed.  I've started ordering some of the more crucial parts, but I think I'll save this subject for a later post.  One of my primary concerns was that the bottom bracket might be French or Swiss threaded, and since I like to convert my bicycles to cartridge bottom brackets, I would have likely needed to pay a lot of money for a press-fit bottom bracket.  I dropped the extra cash to do this on my Raleigh and I've been quite happy with the results, but a bit despondent about putting such an expensive part into such a cheap bike.  My father and I did some research on this particular Peugeot, using the serial number as a guide, and found that it was likely manufactured in the early 80s and that it could possibly have an English-thread bottom bracket, depending on when and where exactly it was produced.  I took the frame in to my LBS and discovered that the bottom bracket is indeed English, which means I can screw in an inexpensive cartridge and worry about it no more.

Overall, I think this is going to be a fun project.  Depending on how it feels, how it looks, and how it rides when I'm done, it may end up taking the place of my old Raleigh Record, which is currently my daily ride.  If this is the case, the Raleigh will likely end up on the auction block.